

How to schedule & post content on social media using Canva
Wait, what?!
I know. I was shocked too when I found out about this feature. So, I had to try it and wow it’s pretty cool. So in this post I want to show you how to do it too. Let’s get started.
Quick Note: This is a premium feature so you may not have full access to all the cool perks.
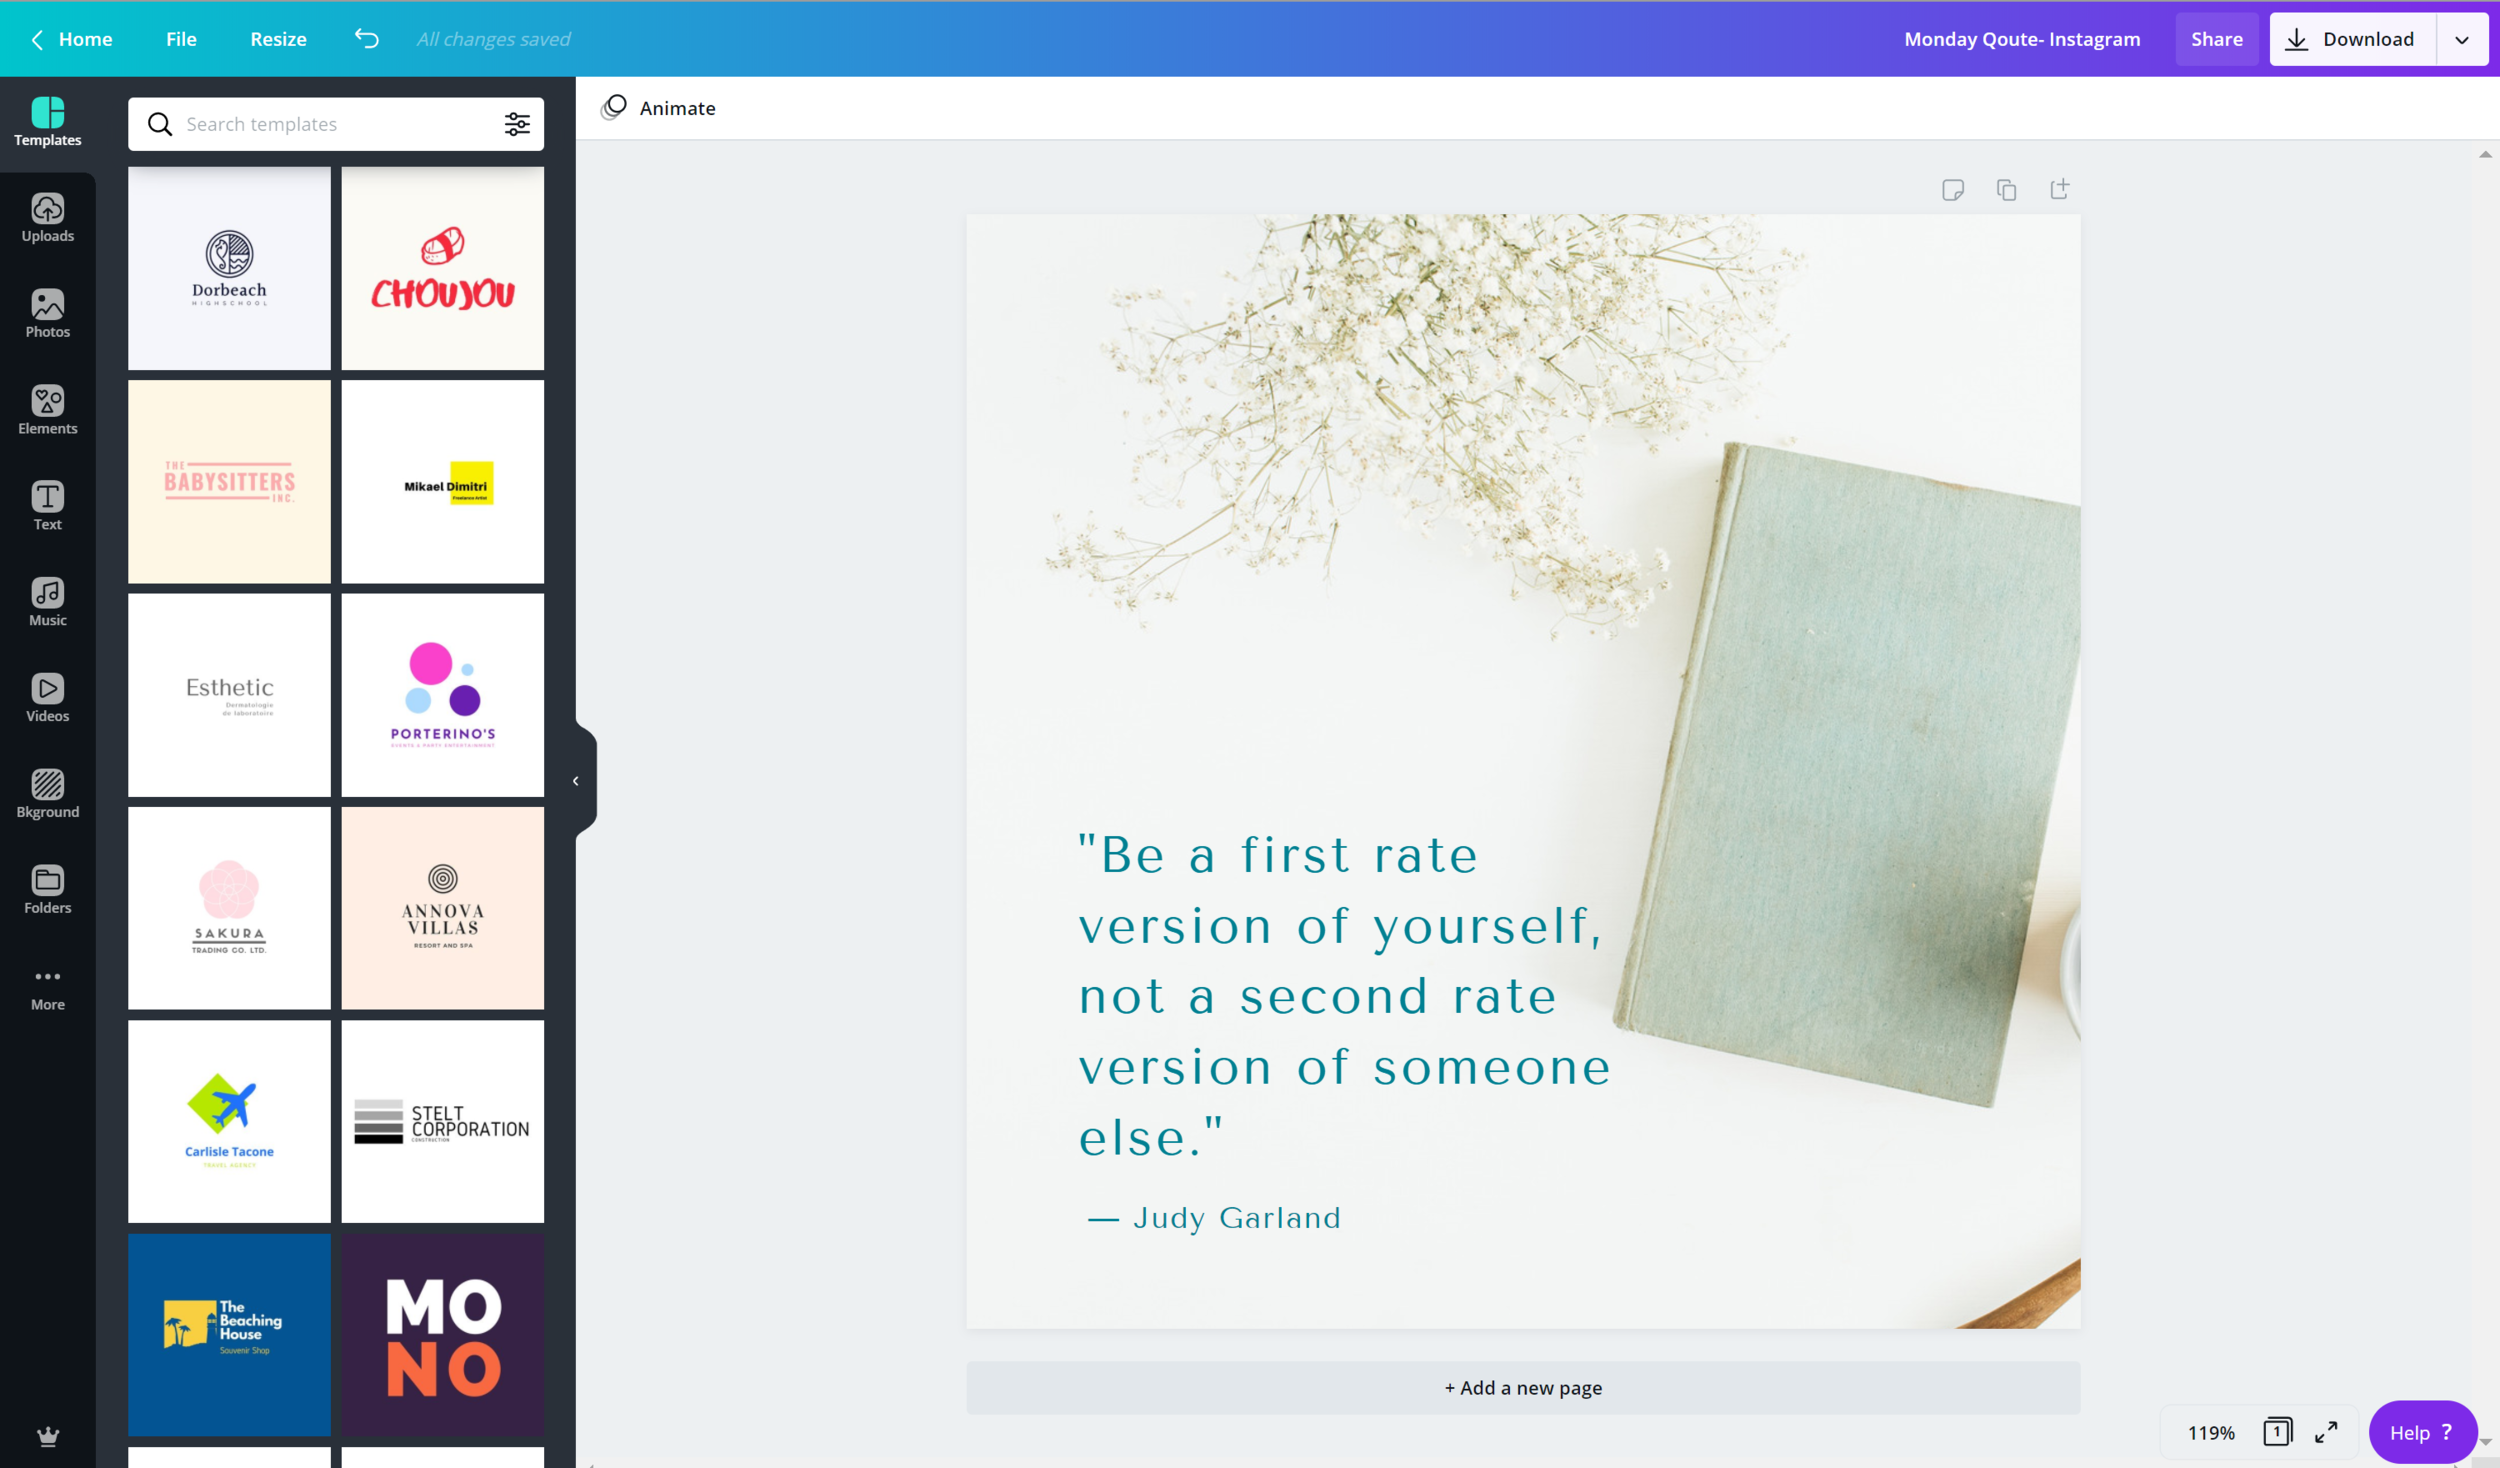
Step One: Select Or Design Content You Want To Post
Select the design or create one in Canva that you would like to post.
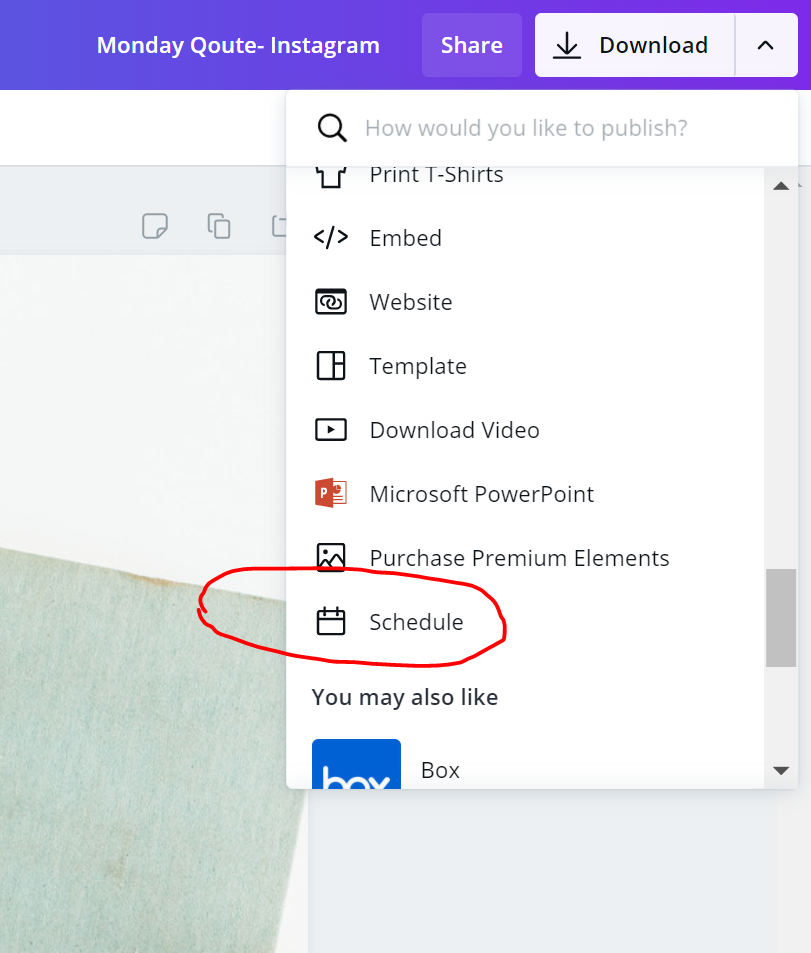
Step Two: Select Schedule Icon
At the top right select the down arrow next to download and scroll till you see the schedule icon.
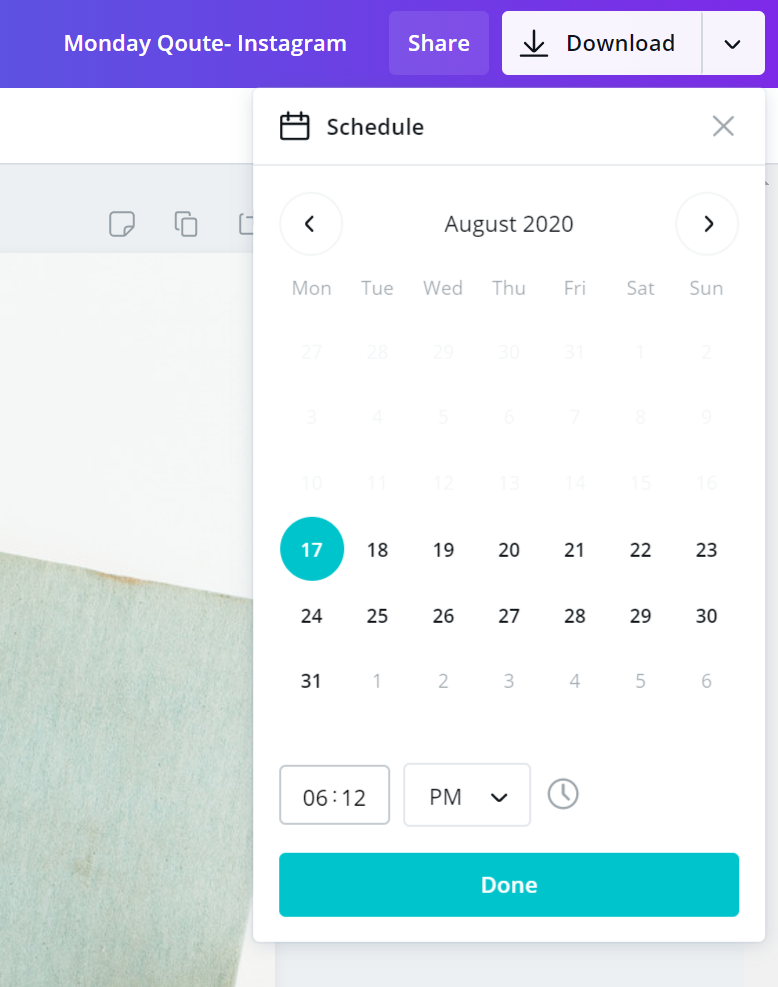
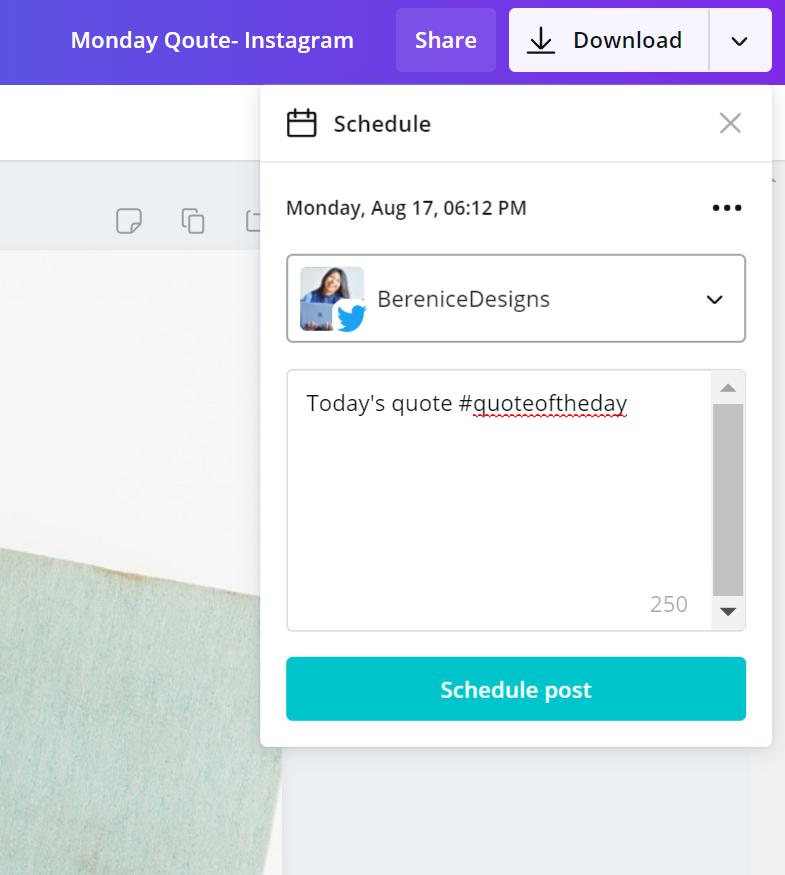
Step Three: Select Date & Time
Now select the date and time you wish to publish your post.
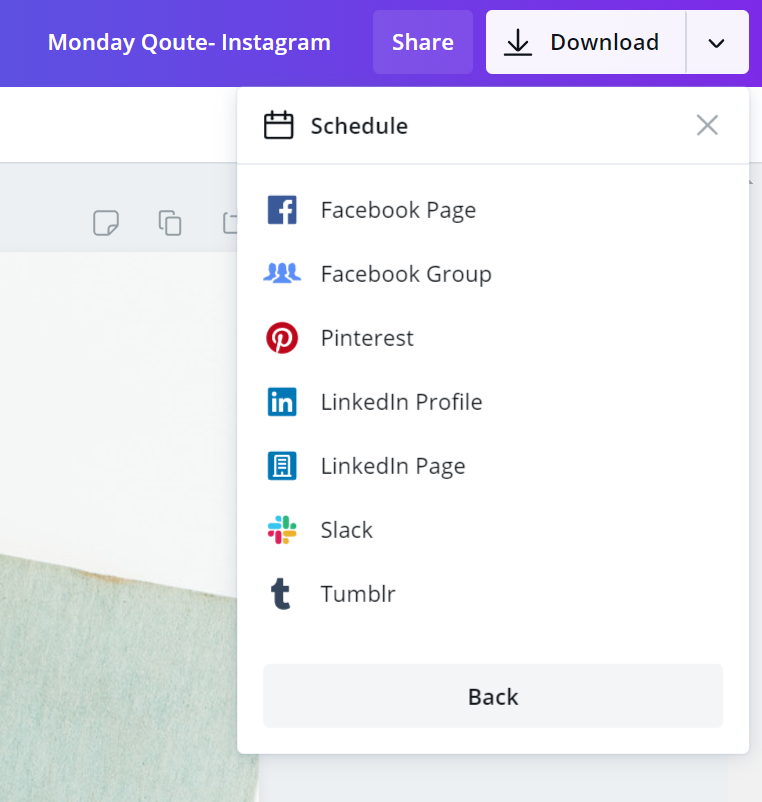
Step Four: Connect Social Accounts & Add Caption
Here is where you can select which account you would like to schedule your post to and what you would like to say. You can also add hashtags.
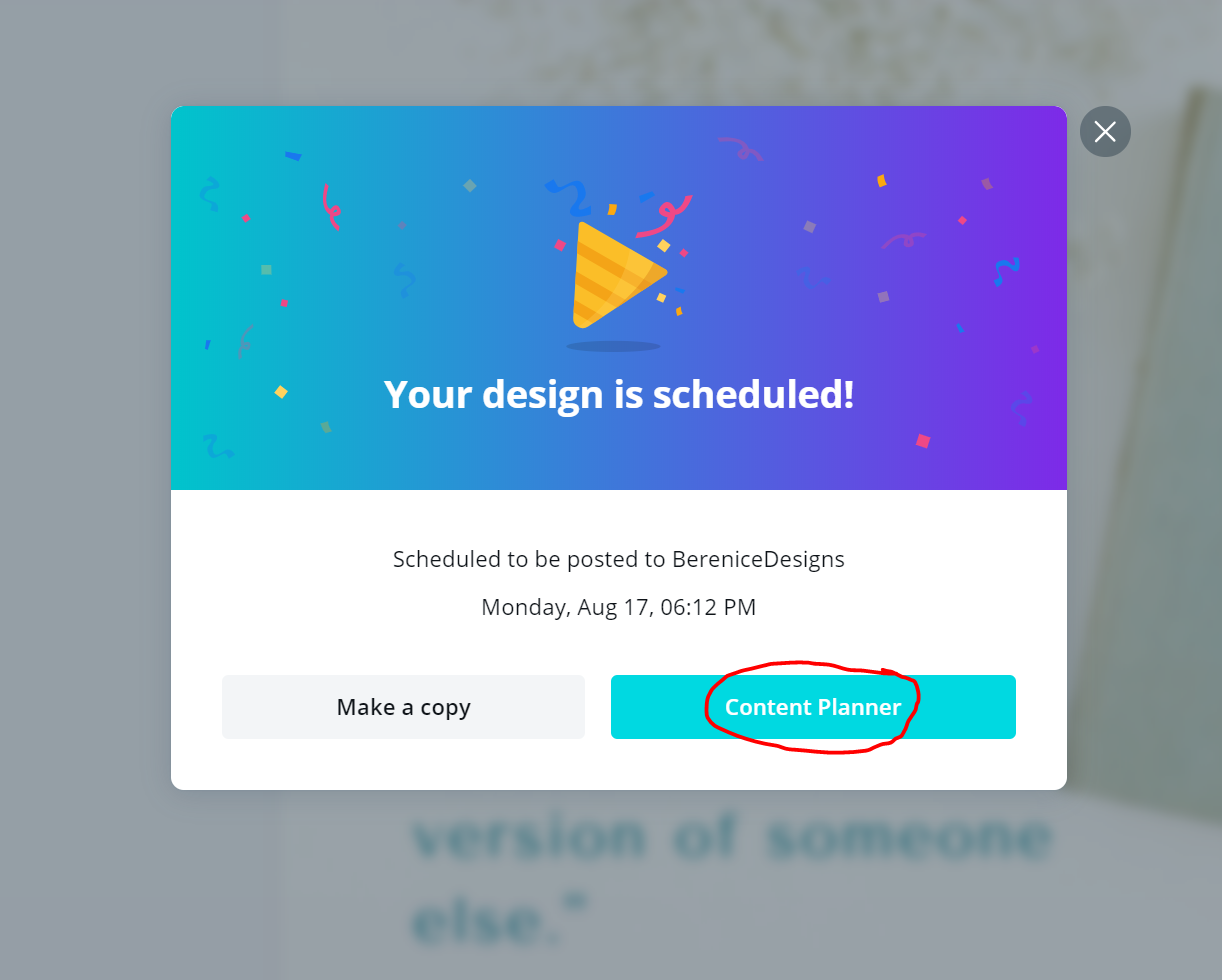
Voilà! All done. You’re post has been successfully schedule and you can view the scheduled post in the content planner.
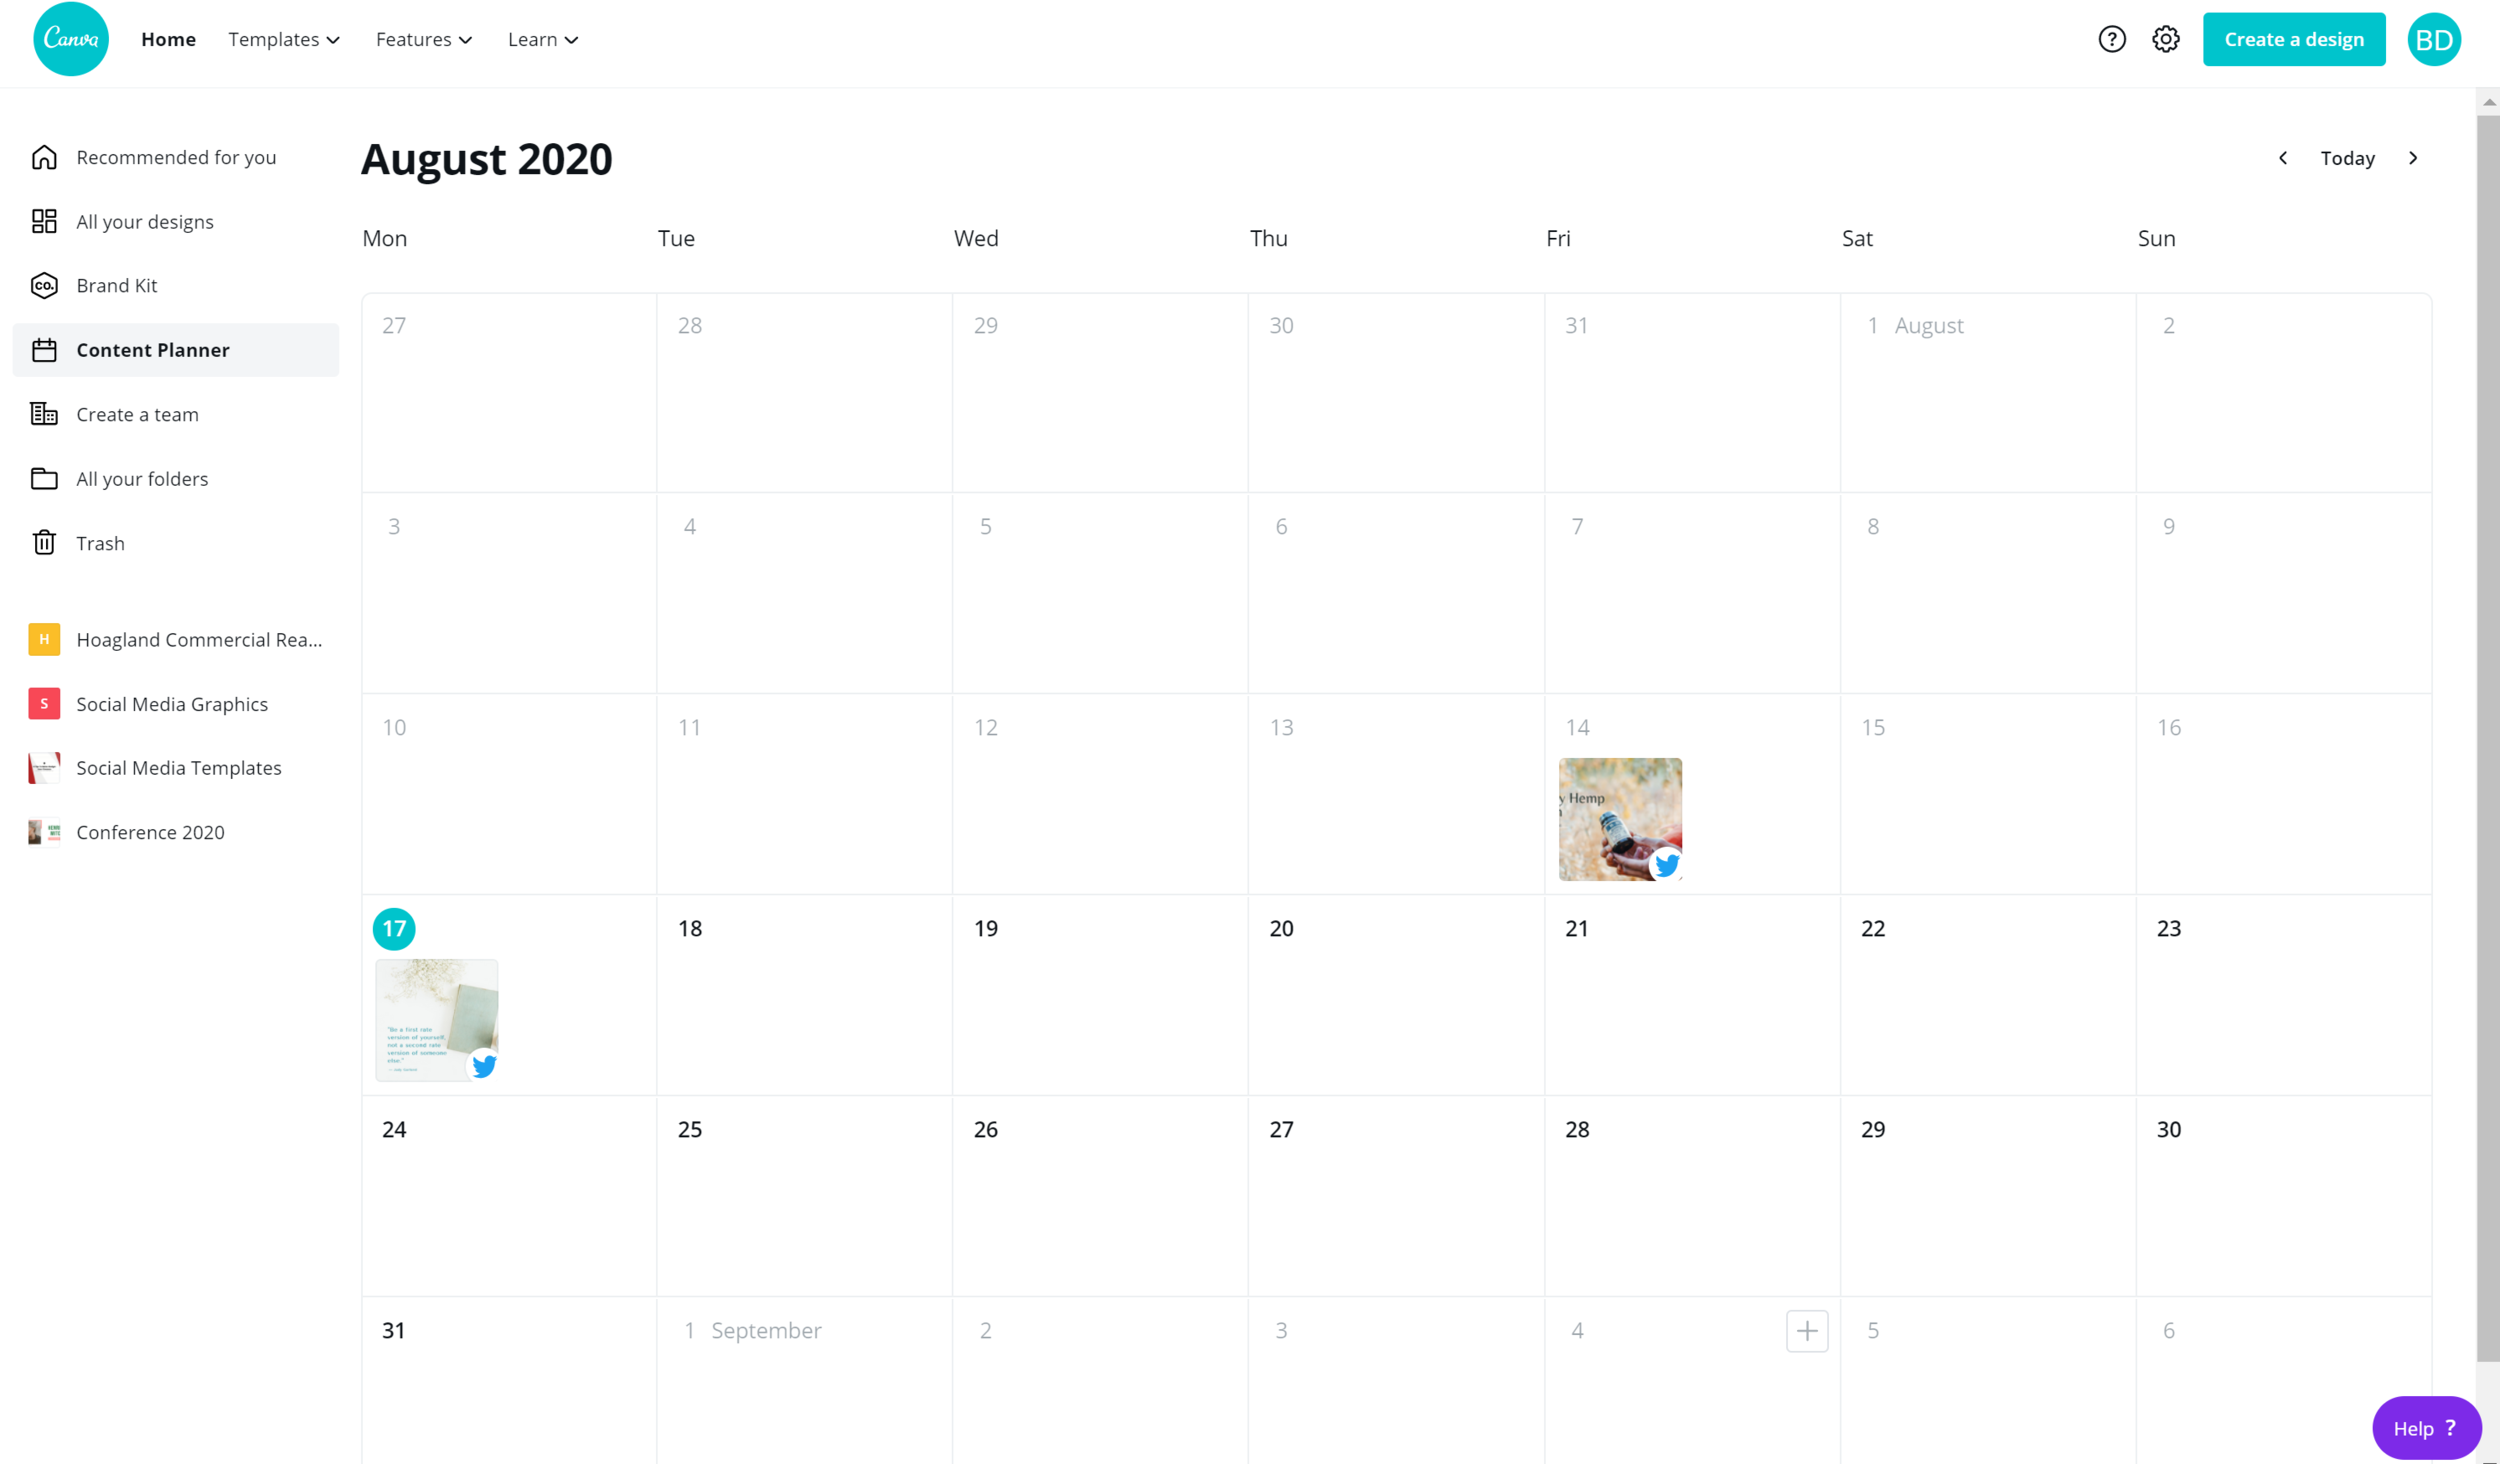
Step: Five: View Content Planner
Now that you’ve posted you’re first graphic, the content planner has been added to your home side bar menu. Here are some things you can do with the content planner.
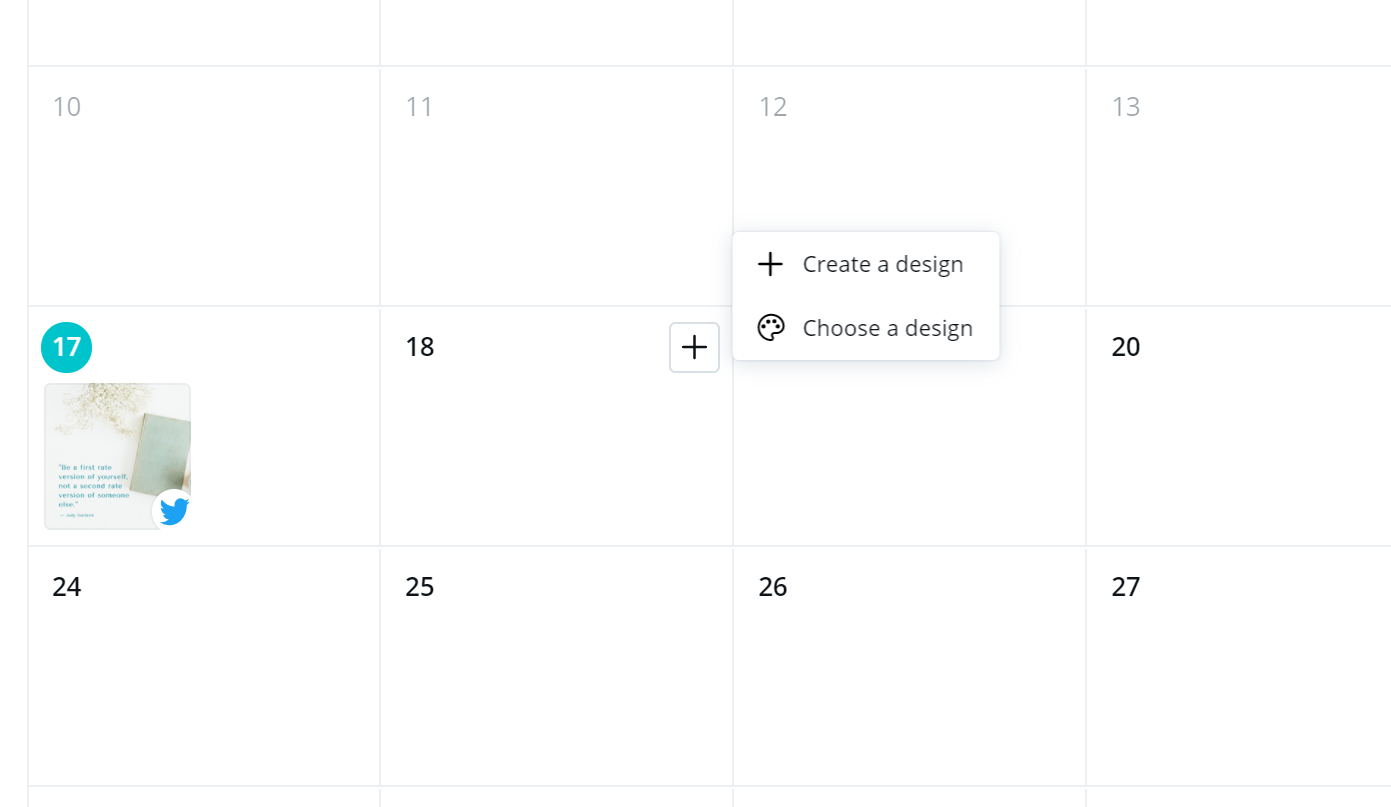
Hover over a date and create a new graphic or select an existing graphic to post.
Review, edit, or delete schedule posts.
Plan your monthly social media content
Alright, that’s it for now. Keep a look out for more tips, hacks, and design tutorials like this one!
Ciao Creatives!
-Berenice